Duplication
This step consists in visualizing the final structure that the "ProjectManager"will apply. The list on the left shows the files to be duplicated (crossed-out font). The list on the right shows, in orange, the duplicated files with their new names. At this stage, you can add a destination directory for the documents by pressing the  with the option of creating the directory if it doesn't exist.
In both windows it is possible to collect  or develop
  lists in a single operation.
A reminder of the number of files taken into account is visible at the bottom of the lists.
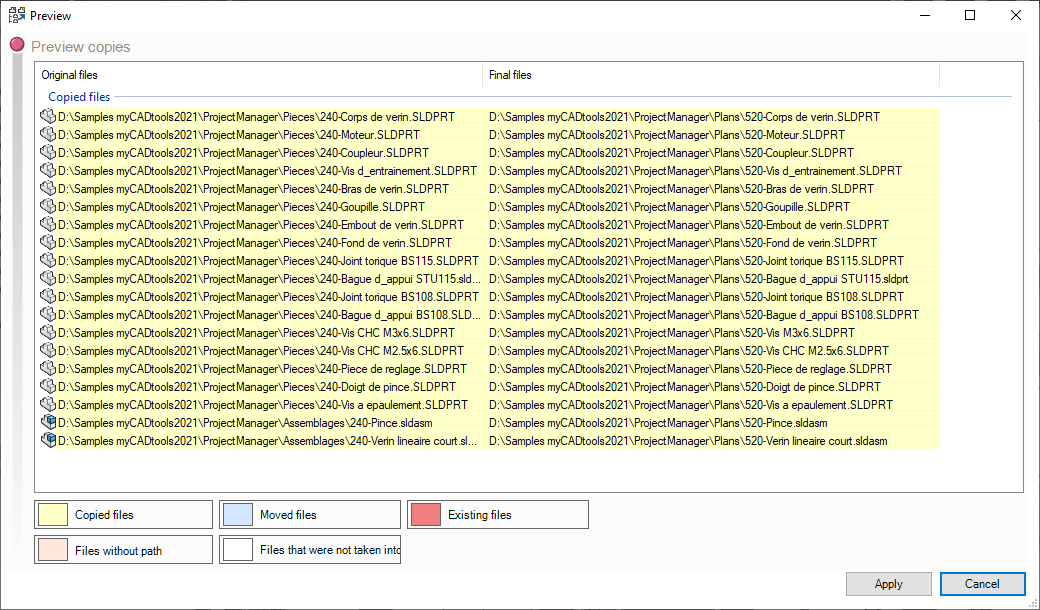
Click on a reference in the list on the left to preview the new name it will take.
Clicking on a reference in the list on the right shows its final location.
If you have made any changes in the '' stepRenameor that you have changed rules you need to refresh this structure view by pressing the  .
.
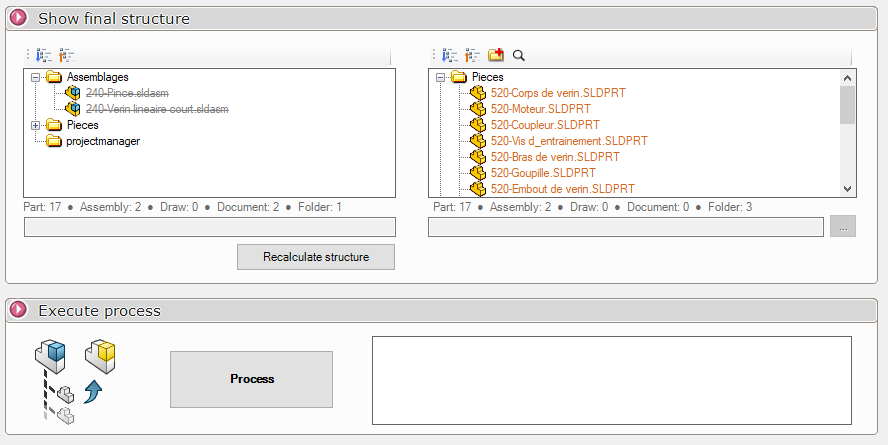
The last step is to launch the duplication operation by pressing the  .
.
This last step is important, and the "ProjectManager"You can then check the duplication result one last time.
Color-coded reminders:
- Color linesYellow"indicate that the files are "Duplicates".
- Color linesRose"indicate that the files are "Modified"For example, if they have undergone modifications such as: adding properties, deleting properties etc...
- Color linesBlue"indicate that the files are "Displaced persons"They are no longer in the original directory.
- Color linesBlanche"indicate that the files are "not taken into account"They are not part of the selection in the project to be duplicated.
By pressing the  you start the treatment.