Report
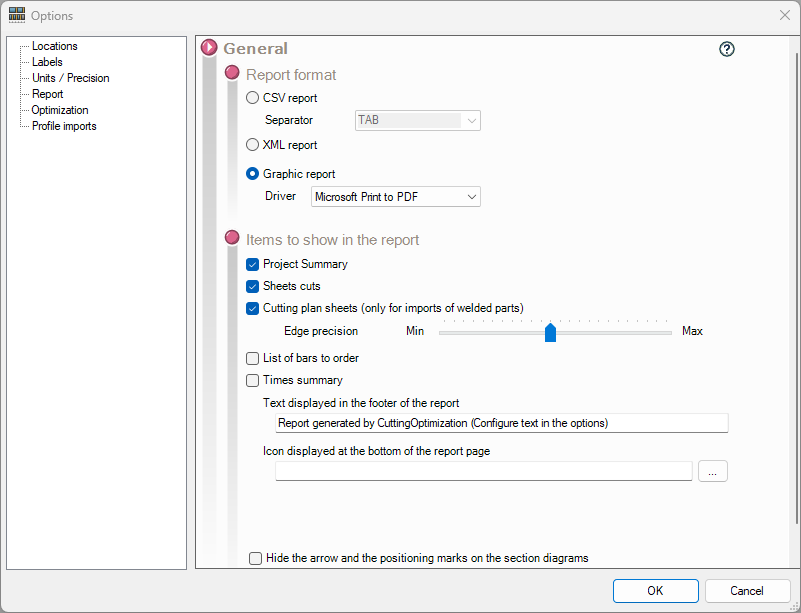
In the options you can define certain parameters for report creation and export to print formats.
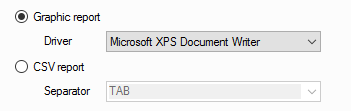
- The report export formats offered are the printers declared under your Windows session and PDF format. Previously, only XPS export was available.
- The report export file can be in CSV format, with the column separator selected to be compatible with Excel.
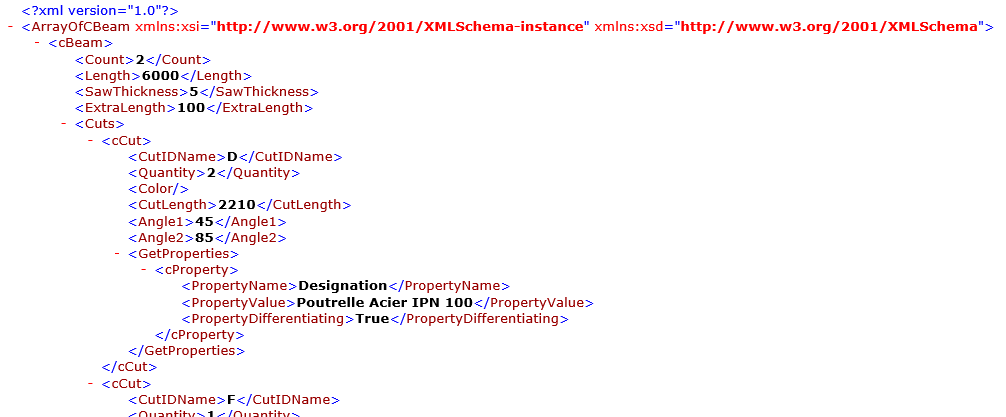
- The report export file can be in XML format for communication with an ERP system, for example.
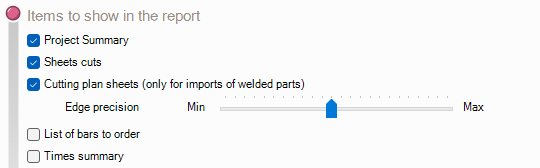
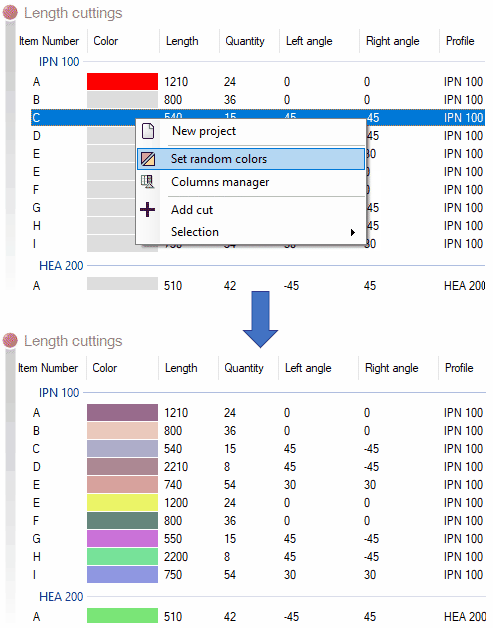
It is also possible to select which elements should appear in the report. In some cases, you may wish to export only the cut sheets and the list of bars to be ordered, rather than the complete project summary.
Project summary :
Part containing, in tabular form, all body details by imported profile:
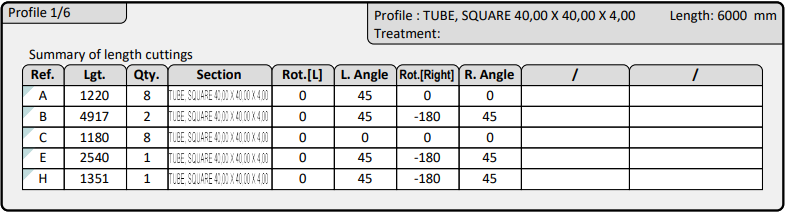
Cutting sheets :
Overview of the cuts on the previously defined bar length with a calculation of the final fall:
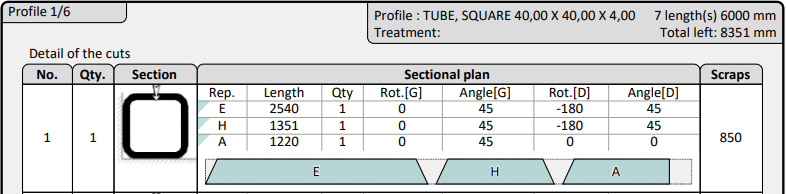
Section plan sheets :
This option allows you to choose whether or not to use the cut detail function below, with a clear view of both cuts. This allows you to see, for example, whether the two cuts are in the same plane, or whether they have been rotated.
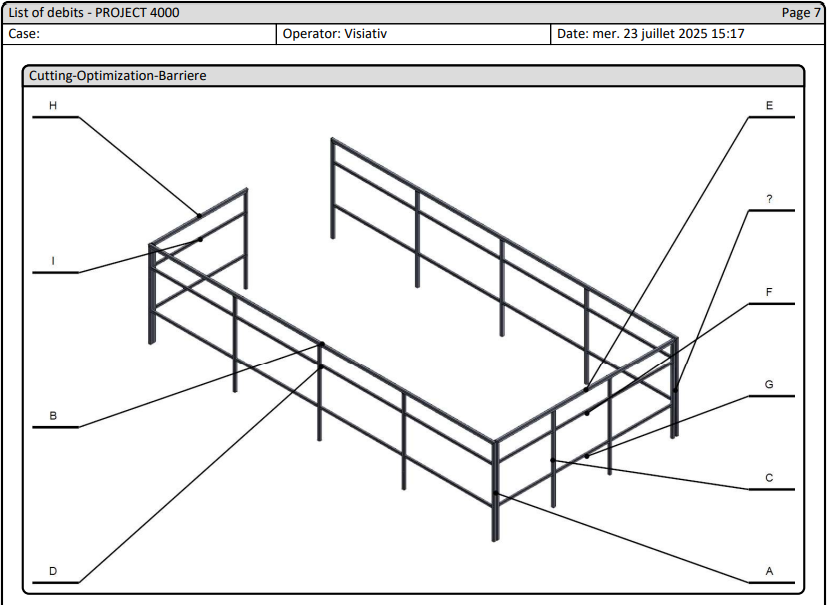
Isometric part view sheets :
This option provides a 3D preview of the various bodies in the final report.
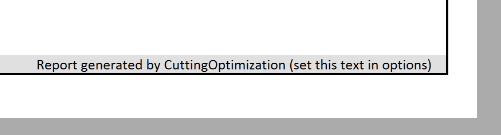
Text displayed at the bottom of the report :

This option displays custom text at the bottom of the report page.
It is also possible to display a customized logo in the report:

XPS viewer :
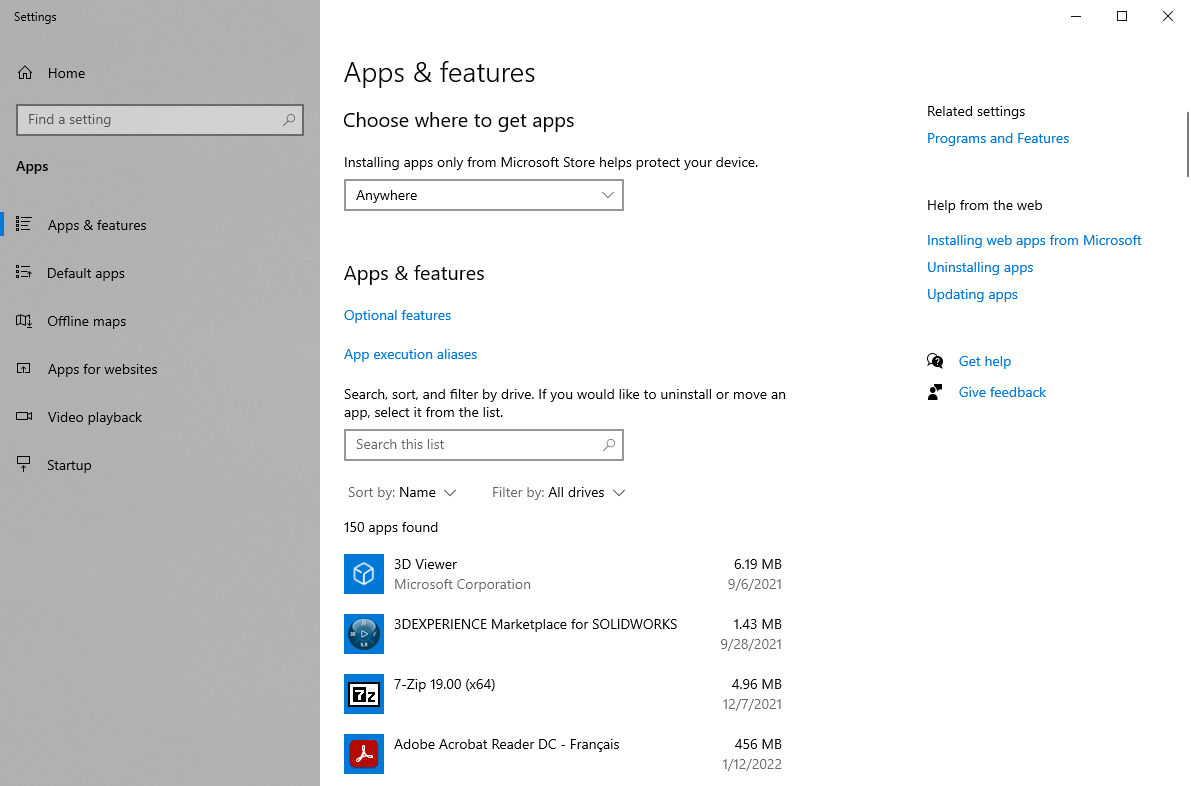
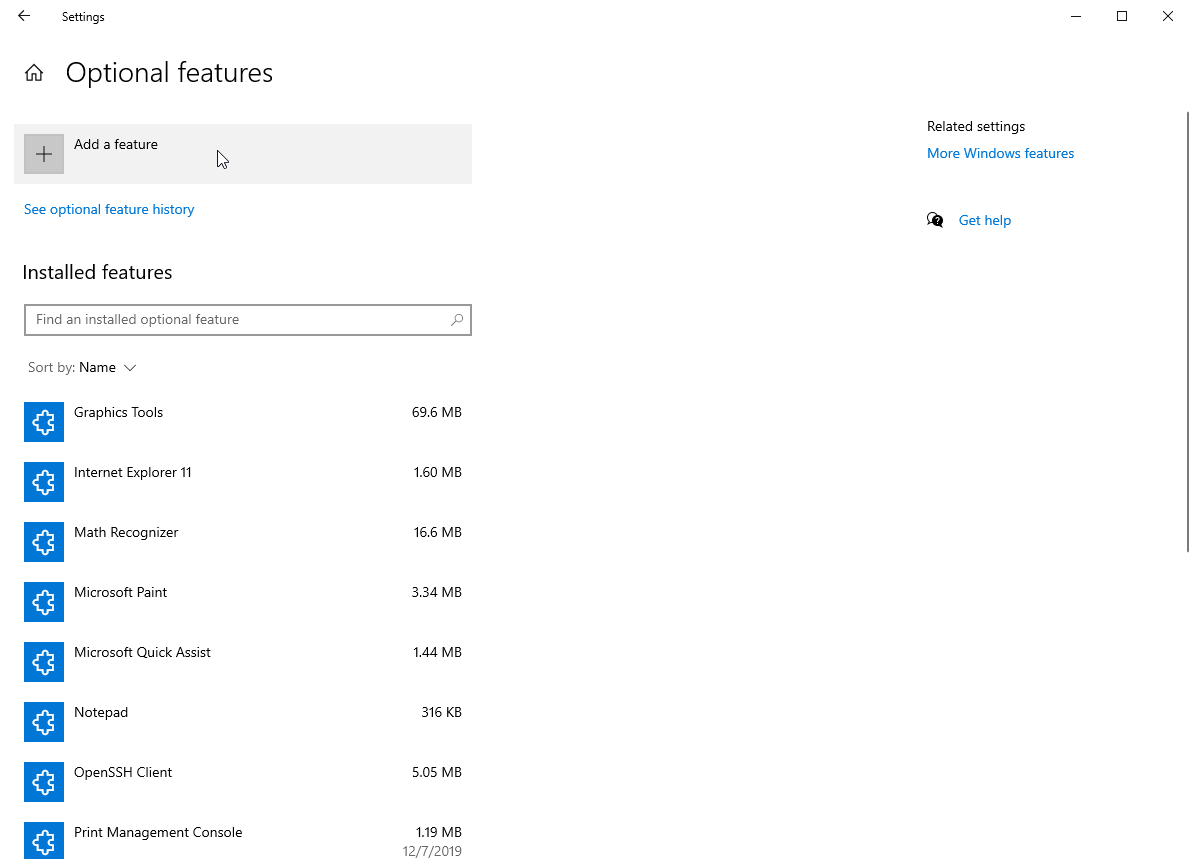
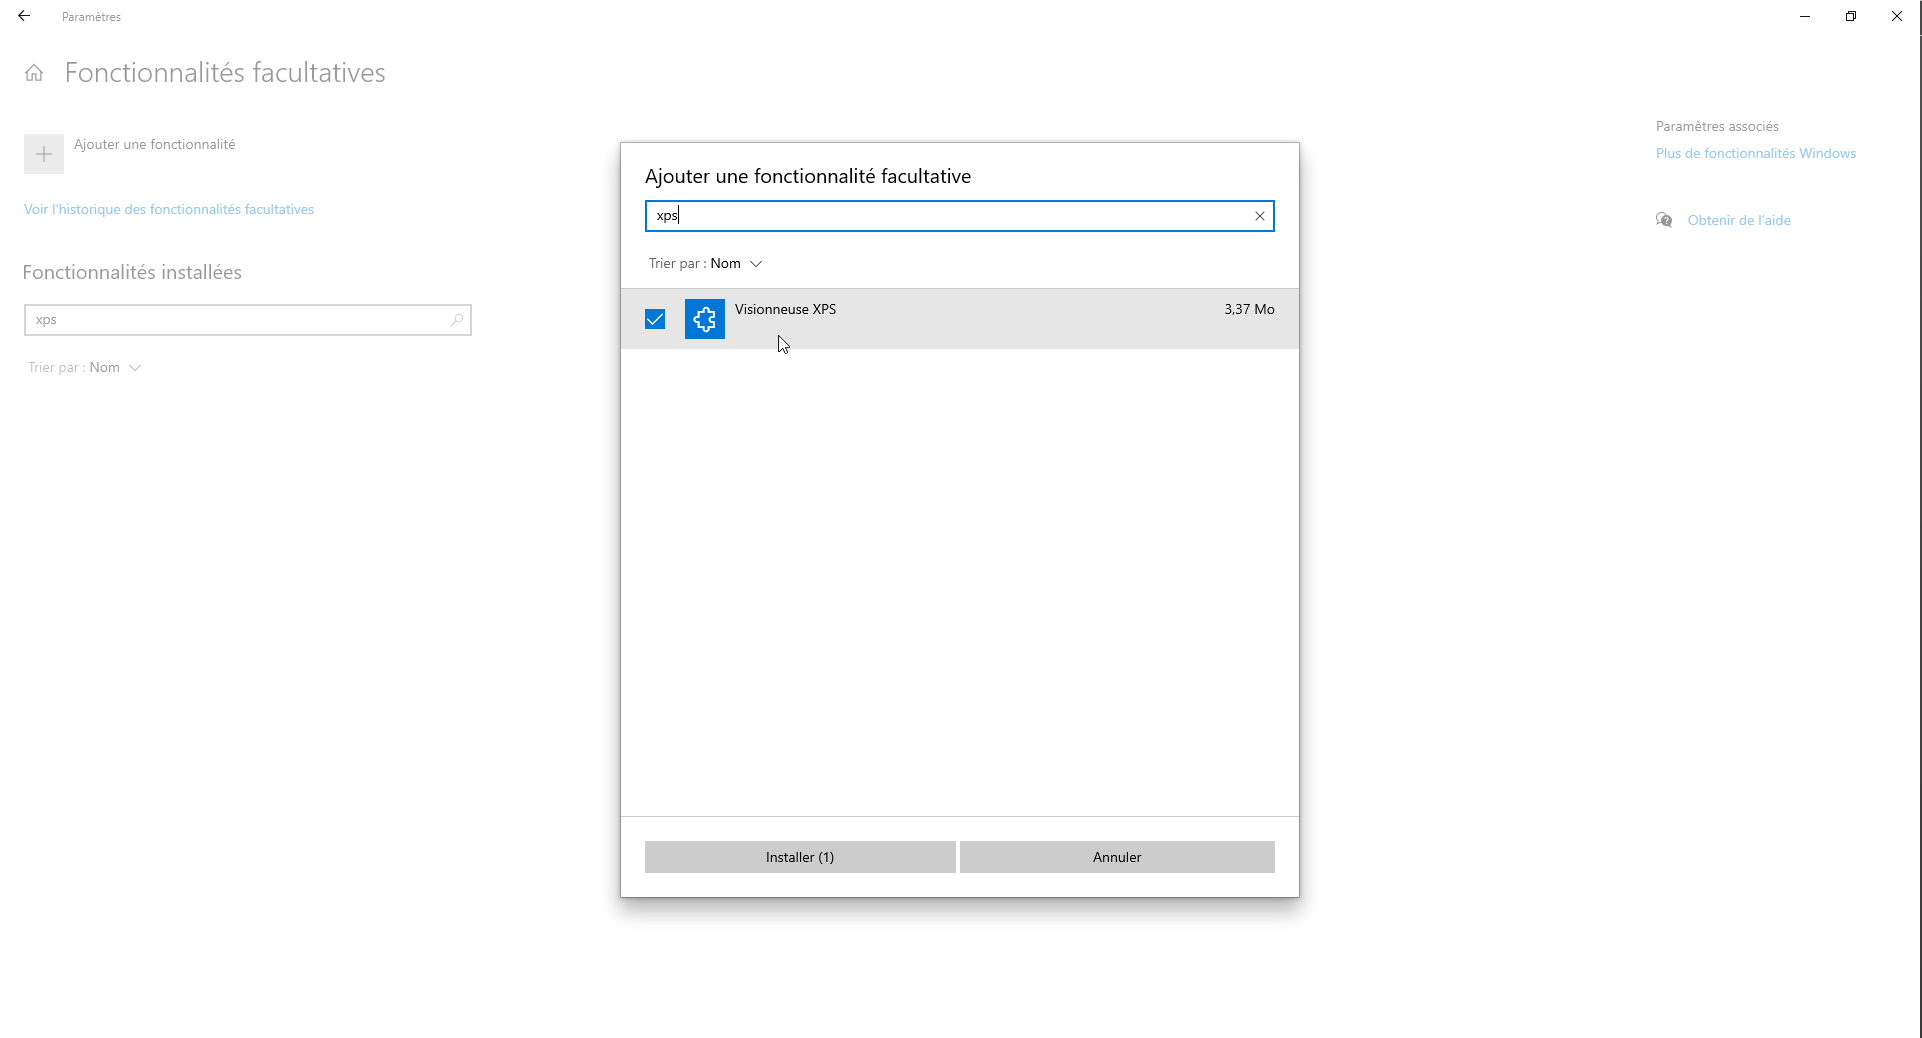
To read your previously generated .XPS files, you need to have the XPS Viewer installed. If you haven't, here's how to install it.
- Go to the Windows "Applications and features" section:
- Then go to "Optional features" and click on "Add a feature" :
- Type "XPS" and install the "XPS Viewer":
- Once installed, your XPS Viewer will be available in your Windows Start menu:
