
Editing Options
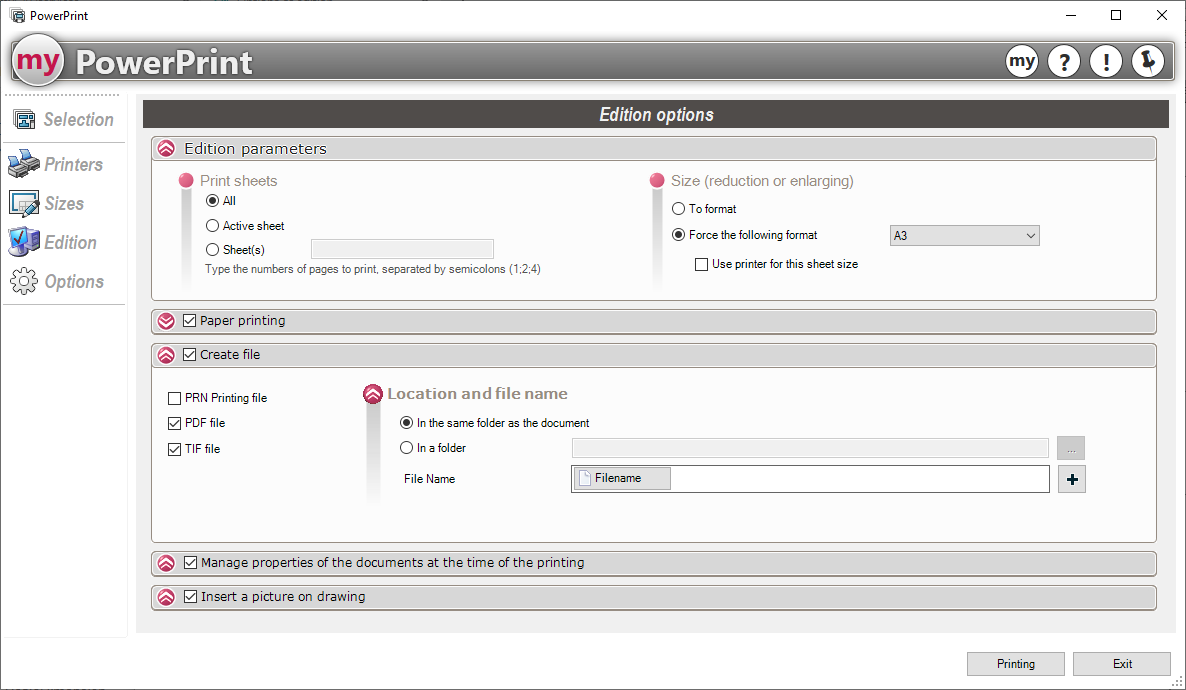
- Print on paper:

- Number of copies:
Specify the number of copies for all selected documents.
- Inserting a stamp:
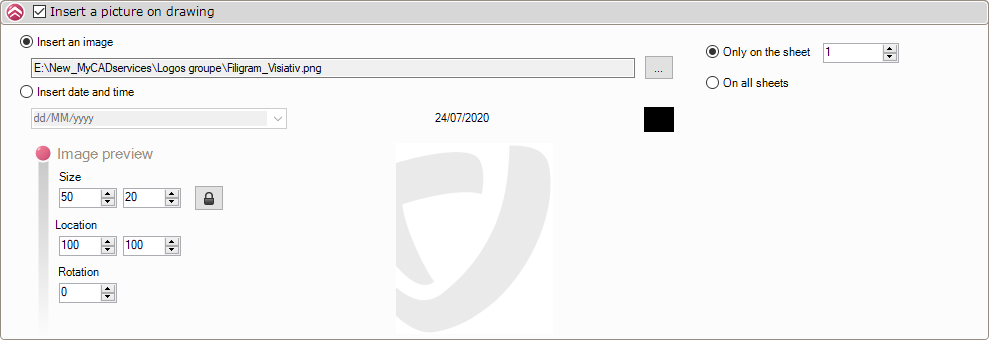
- Select the image to insert
 Next, specify whether the image is to be inserted on all sheets or only on a particular one. Finally, set the dimensions of the inserted image (size, position on the sheet).
- Or choose to print the date and specify its format.
- You can also adjust the color.
- Creating a file:

This window allows you to create PRN, PDF, and TIF print files from the selected documents.

- In the same directory as the SOLIDWORKS document:
This option allows you to save the converted file in the same folder as the original file.
- In a directory:
This option allows you to select a folder  in which to save converted files. In this example, all my files will be saved in the folder ''.Project''.
- File names:

This option lets you rename exported files with predefined fields. Field selection  .
See the chapter " Generating Fields "
- Manage document properties when printing:

This window is used to update document properties before printing. Field selection .
See the chapter " Generating Fields "
Example: In a drawing title block, we will enter two properties —“Modified on” and “User” — before printing the documents.
Field selection .
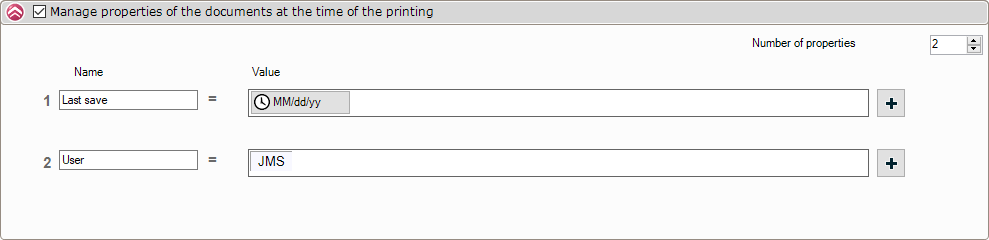
The properties will be filled in during printing.
 A maximum of 5 properties can be added
 .
- Publishing settings:

- Printing the plan sheets:
This option allows you to print all sheets, only the active sheet, or select the page numbers to print.
In this example, only pages 1 and 2 of all selected documents will be printed.

- Size (Reduce/Enlarge):
- " In the format" - The printout is generated in the format of each selected document.
- " Enforce the following format " - This option allows you to enforce a print format.

In this example, all selected documents will be printed on A4 paper, regardless of their default paper sizes.
 this option is linked to the '' optionImpose the following format'' and force the printer selected in chapter ''Printer definition'' for the chosen format.