Options

In this section, we set the information for exporting BOMs in Excel format.
The first tab allows you to :
- Specify the folder where your Excel BOM examples (templates) are saved. You can select templates in "xls" or "xlsx" format.
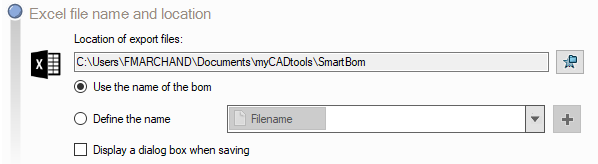
- You can specify the directory and file name for exporting the Excel file. You can choose to use the name of the current BOM or create a new name using the renaming. This folder can be located locally or on the network, so that it can be shared with several workstations.
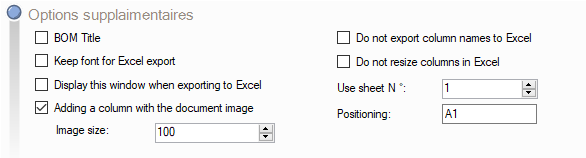
- BOM title: Displays the name of the BOM defined in the project in the BOM header.
- Keep font for export to Excel: When the font has beenmodifiedthis font can be retained by checking this box, otherwise the font defined in the Excel template will be applied.
- Show this window when exporting to Excel: This dialog box can be opened when the file is saved.
- Do not export column names: If this option is checked, column names will not be displayed in the Excel BOM.
- Do not resize columns in Excel: If this option is ticked, column sizing is not applied and columns remain in the template state.
- Add a column with the document image: preview 3D in your Excel table
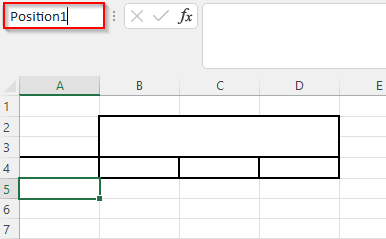
- The BOM can be inserted from a particular position (column-line) if, for example, there is information to be displayed before the BOM (e.g. logo, date, company information etc.). Please note that one sheet per BOM, specified in the project, will be automatically created in the Excel export file.
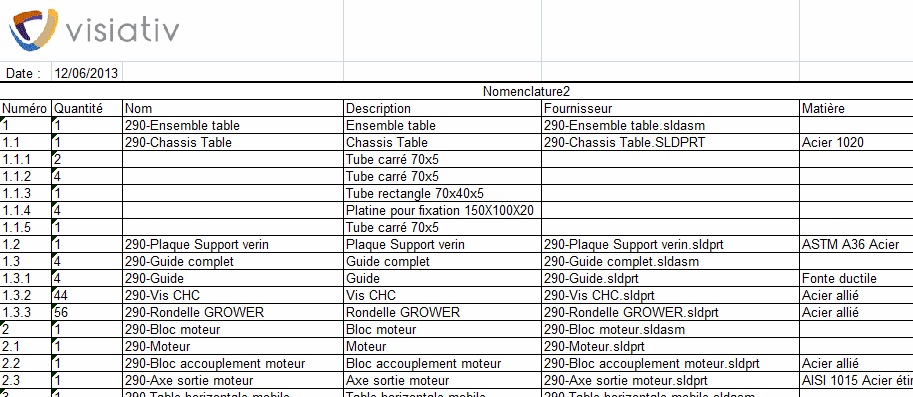
Example :
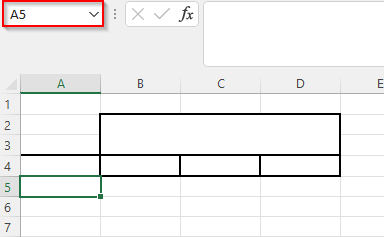
Tip:
It is also possible to give a name to your starting cell and then retrieve this name in SmartBOM's options like this:
 →
→ 
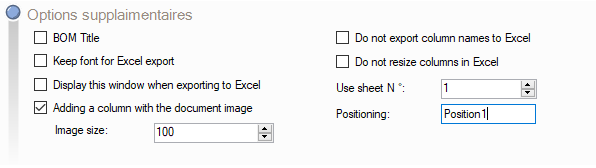
This allows you to have different Excel templates with different BOM starts, but with similar SmartBOM parameters.